Start a job and print labels at the Recording Terminal
The Recording Terminal is the tablet at the machine. The operator uses it to start the job, change its status and print the bag labels. The buttons are big so they are easy to press with gloves on.
Quick steps
- Production → Recording Terminal
- Press your machine
- Press START
- Press Print label
- Check the label, bag no. and printer, then press Print
1. Open the Recording Terminal
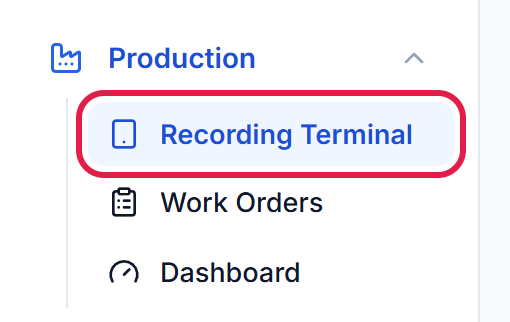
In the menu, open Production and press Recording Terminal.
2. Choose your machine
Every machine is a big tile. A machine with a job waiting shows Waiting to start and the work order number. Press your machine.

The tablet remembers the machine, so next time it opens straight on it. Press ‹ at the top to choose another one.
3. Start the job
Check the work order number and the item, then press the big green START.
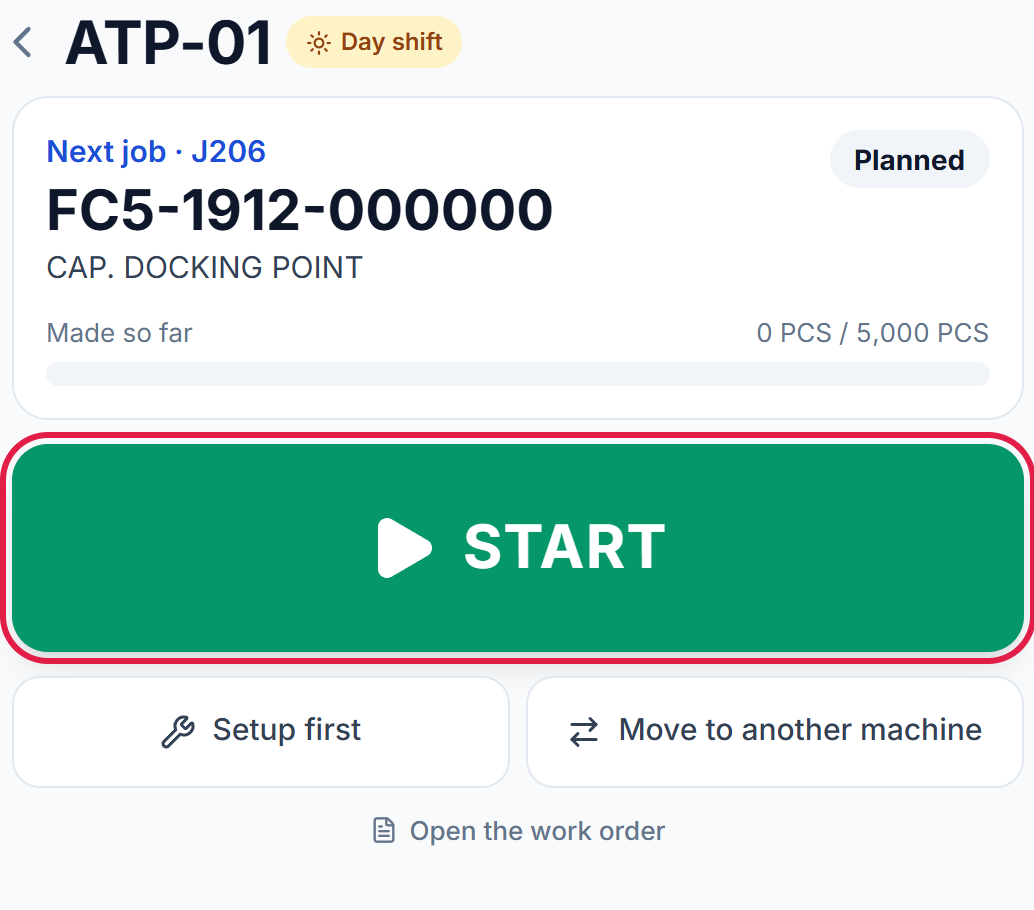
If the mould still has to be set up, press Setup first instead, then Running when the machine is ready.
4. Press Print label
When the job is running, the status buttons show Running in green. Press Print label.
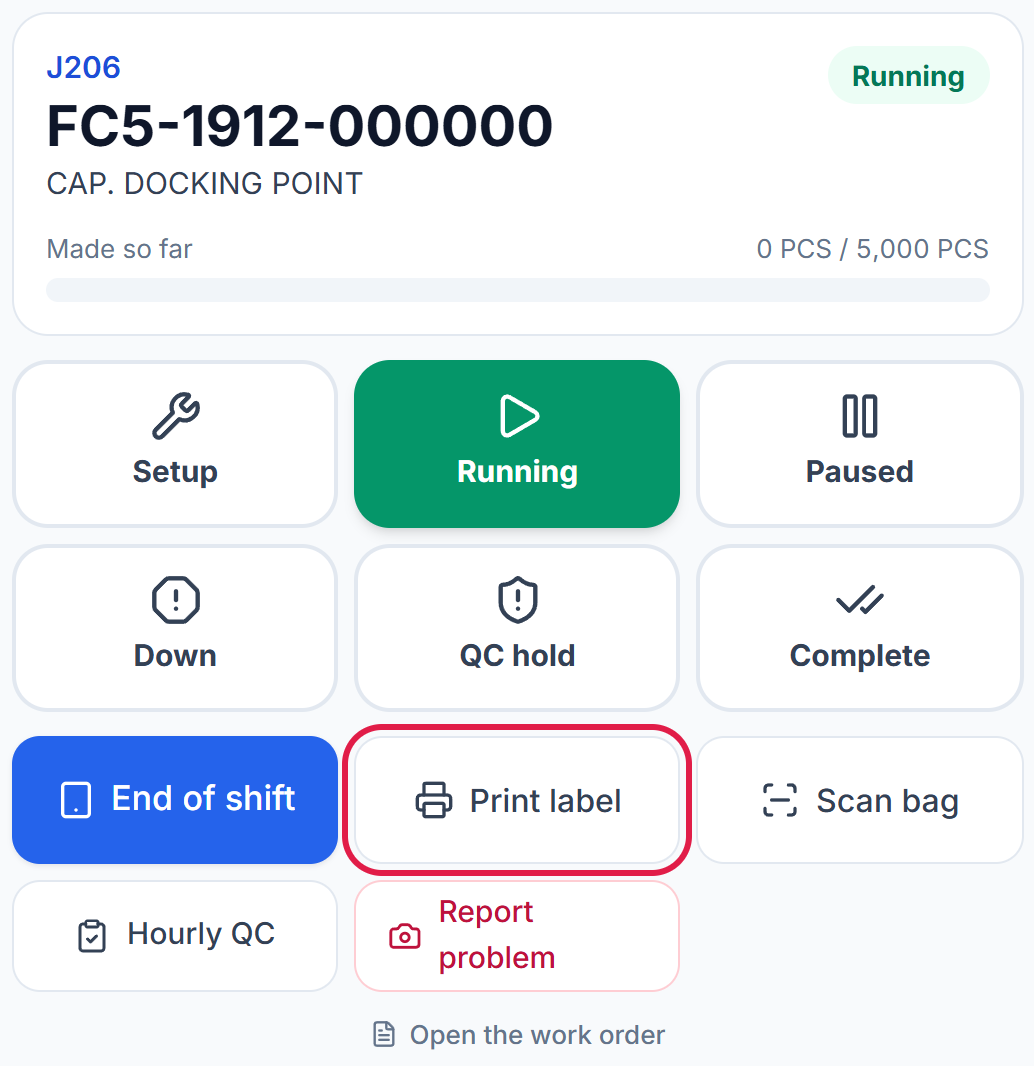
The other buttons, for later lessons: Paused, Down and QC hold change the machine status, Complete finishes the job, End of shift records the output, and Scan bag reads a printed label.
5. Check and print
A window opens with the label already filled in from the work order.
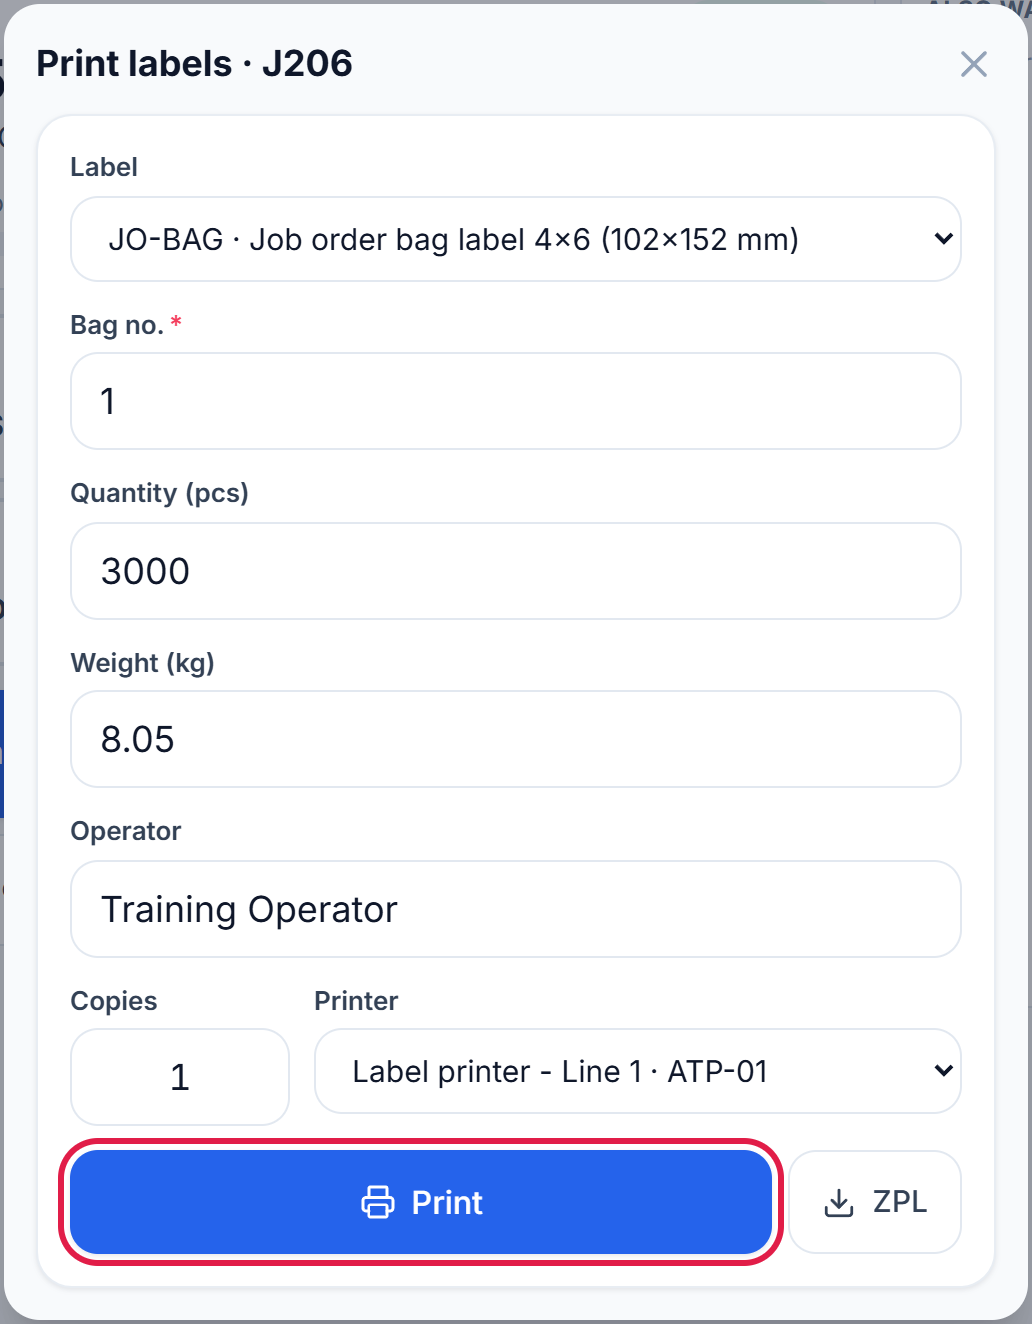
- Label: the bag label design. Normally there is only one to choose.
- Bag no.: type the number of the bag this label is for: 1 for the first bag, 2 for the next, and so on.
- Quantity, Weight and Operator come from the work order and your account. Check them.
- Copies: how many of the same label (normally 1).
- Printer: choose the label printer at your line.
- Press Print.
A green message at the bottom of the screen confirms the label was sent to the printer.
Check that the printer is on and has labels, then press Print label again. Every printed label is recorded on the work order, so a supervisor can see what was printed. Never write a bag number by hand.
On machine ATP-02, start the work order you created in the last guide and print the label for bag 1.