Create a work order
A work order tells the factory what to make, on which machine, how many, and by when. Once it is saved, the job appears on that machine at the Recording Terminal, ready to start.
Quick steps
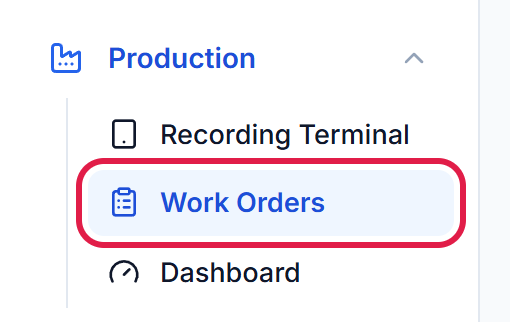
- Production → Work Orders → New work order
- Choose the item code (press the magnifier to search)
- Type the planned quantity
- Choose the machine, the start and the target end
- Check cycle and cavity
- Press Create work order
1. Open Work Orders
In the menu on the left, open Production and press Work Orders.
Then press New work order at the top right.

2. Choose the item
The account book is filled in for you (here ATP Test). Next to Item code, press the magnifier button. Type part of the code or the name, then press the item you want.
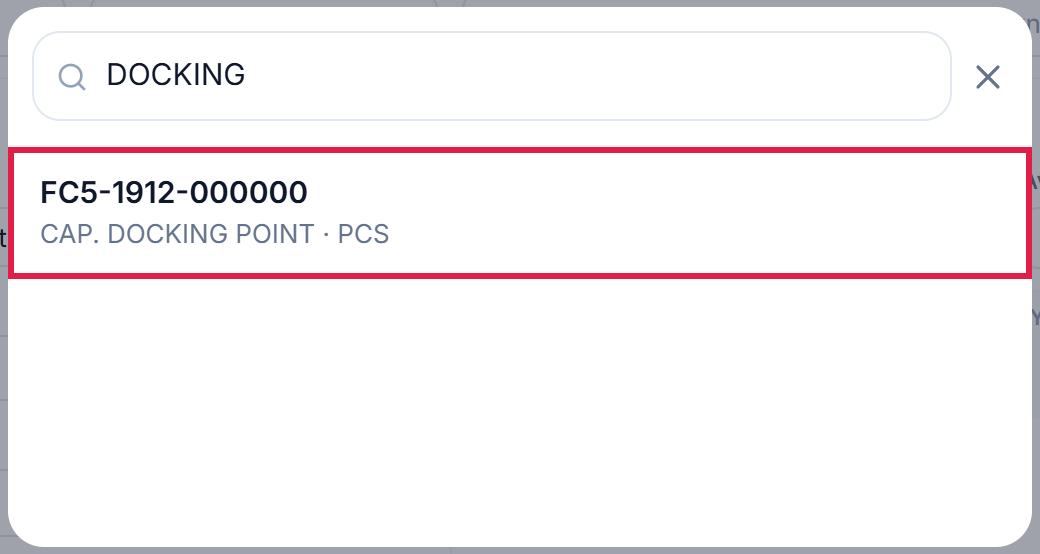
MES fills in the product name from AutoCount. If this item was made before, the mould, cycle and cavity are copied from its last work order, so check them instead of typing them again.
3. Type how many to make
Type the planned quantity and choose the unit (PCS, or BAG when the item has a bag unit). The grey text beside it shows the same amount in bags.
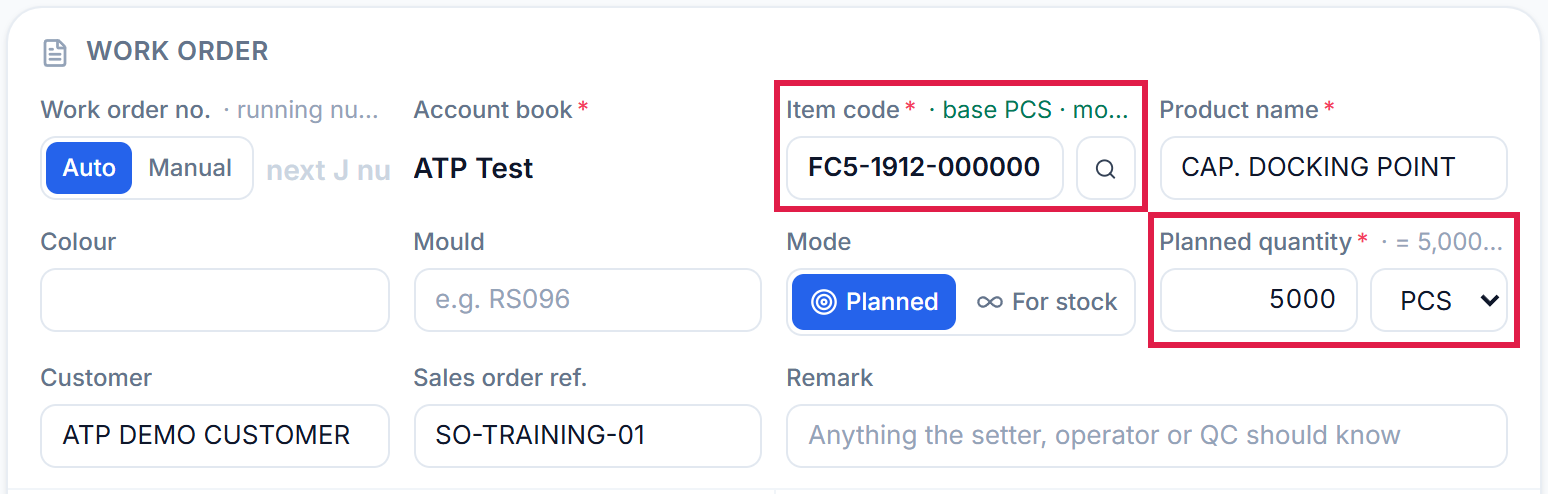
Customer, sales order ref. and remark are optional, but they help the operator and QC.
Leave Mode on Planned when you know how many to make. Choose For stock only for a job that keeps running until someone stops it.
4. Choose the machine and the time
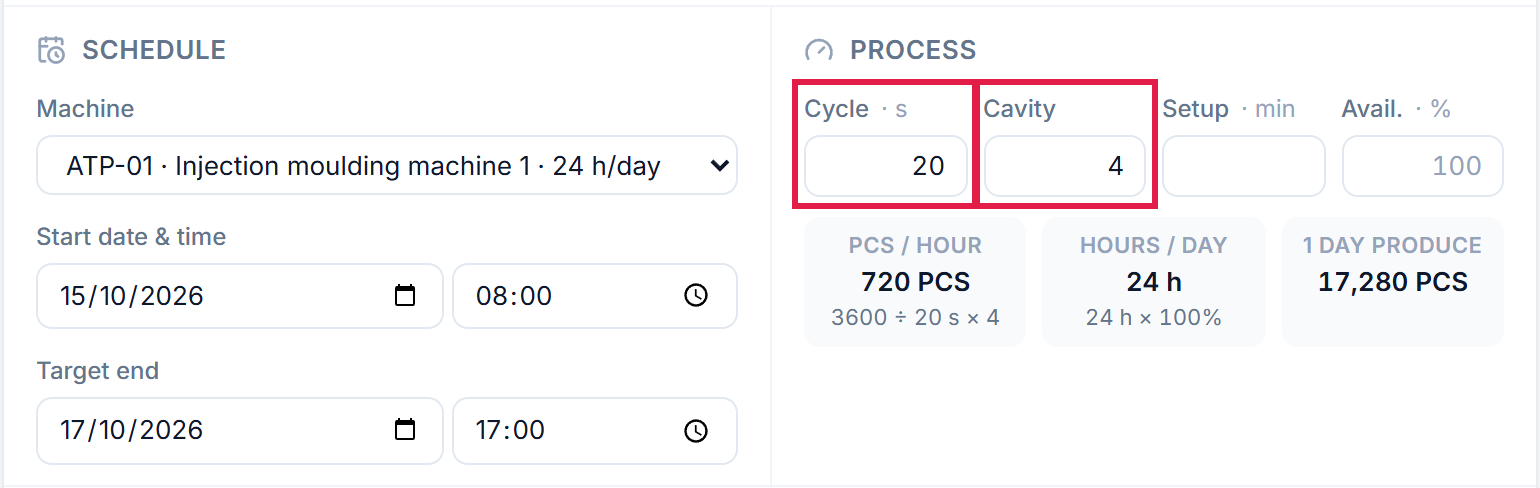
Under Schedule, choose the machine, then the start date & time and the target end.
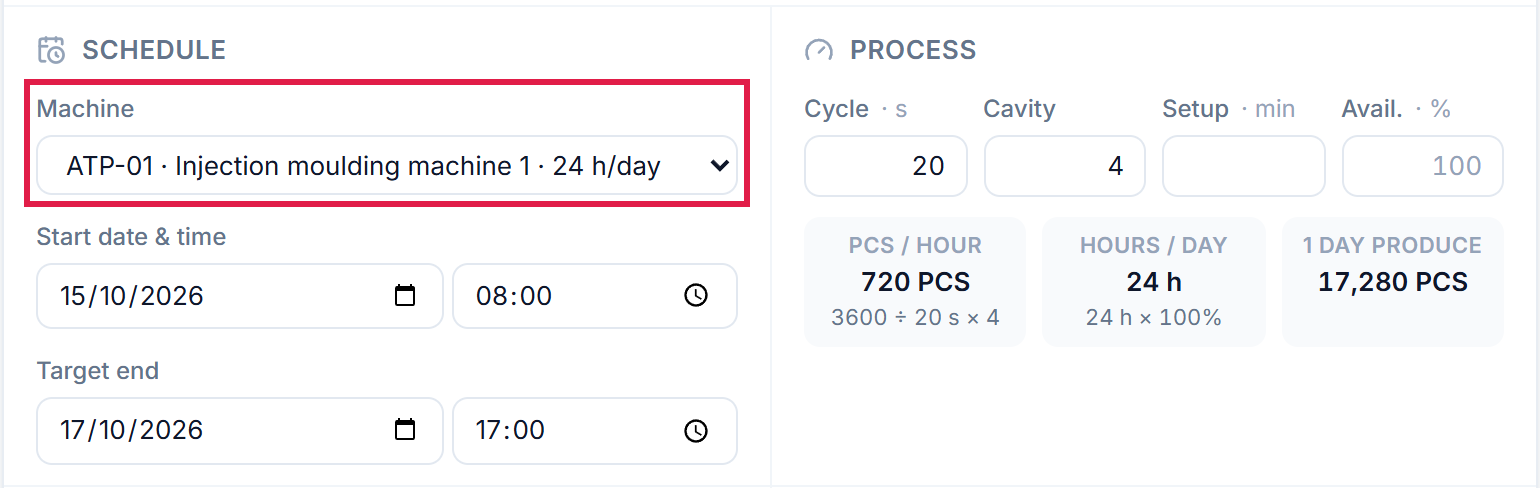
Under Process, check the cycle (seconds per shot) and the cavity (pieces per shot). MES works out how many pieces the machine makes per hour and per day.
5. Create it
Press Create work order at the top right.

MES gives the work order its number by itself and its status is Planned.

The job is now waiting on its machine. Next: start it and print labels.
In the ATP training company, create a work order for 5,000 PCS of FC5-1912-000000 on machine ATP-02, starting
tomorrow at 08:00. Then find it on the Recording Terminal.